
How to Raid on Twitch?
Raiding on Twitch can be an exciting way to engage with your community and support fellow streamers. You’ve just wrapped up an awesome stream, and now it’s time to guide your viewers to another channel. But how do you guarantee it goes smoothly and leaves everyone feeling pumped? Let’s explore the steps and tips to make your Twitch raid an unforgettable experience. Ready to take your streaming game to the next level?
Key Takeaways
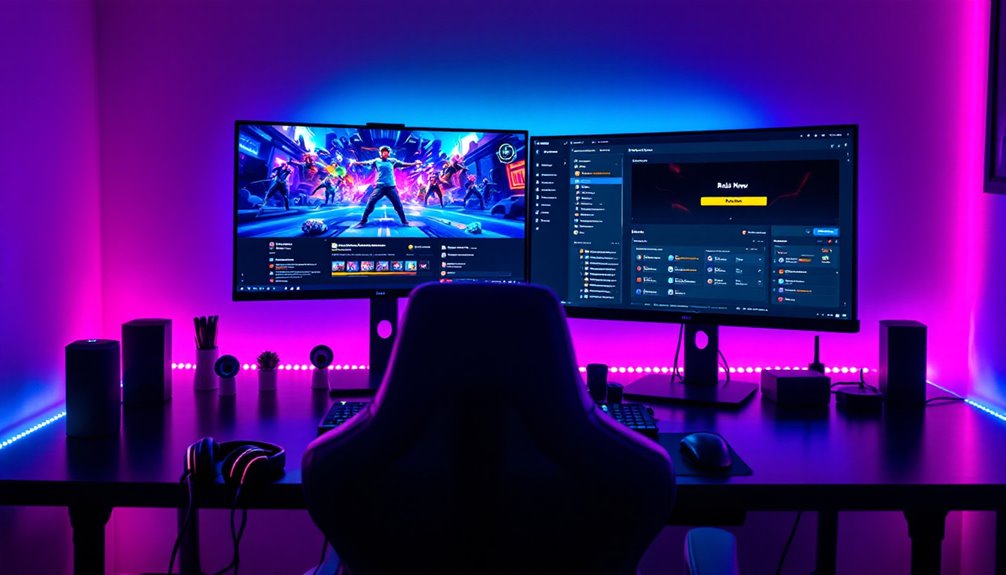
- Access the “Creator Dashboard” and navigate to “Stream Manager” for raid options.
- Use the “Quick Actions” menu to add and select “Raid Channel”.
- Prepare viewers and initiate the raid by typing ‘/raid ChannelName’ in chat.
- Monitor the 10-second countdown before launching the raid.
- Ensure moderators manage the raid for a seamless experience.
Building Excitement for Your Twitch Raid
Ever wondered how to make your Twitch raid an unforgettable experience for your viewers? Start by creating a buzz with Countdown Strategies. Announce the raid a few moments before it kicks off to build anticipation. This keeps your audience on their toes and ready for the shift. Encourage Viewer Engagement by involving them in the channel selection process—let them feel like they’re part of the action! Share what they can expect from the raid and emphasize the unity it brings to your community. Use the chat to stir excitement and discuss the new content they’re about to explore. Your viewers will appreciate the heads-up and participate with enthusiasm, turning a simple raid into a memorable adventure. Choose entertaining channels and involve your viewers in the decision-making process for raid targets to ensure everyone is engaged and excited.
Choosing the Right Channel to Raid
When you’re picking the perfect channel to raid, think about how well their content aligns with what your audience loves. You want to keep your viewers hooked, so choose someone whose style and themes match your vibe. Don’t forget to check the quality of their streams—nothing turns off an audience like a choppy, low-quality show! Raiding fosters connections between streamers, so selecting a channel that resonates with your community can enhance viewer engagement and promote mutual growth.
Audience Alignment Considerations
To make your Twitch raids successful, you need to choose the right channels that align with your audience’s interests. Start by considering audience demographics and community engagement. Here’s how:
- Shared Interests: Pick channels in the same genre as yours. If you’re a gamer, raid another gamer or related creator. This alignment keeps your viewers engaged and happy. Twitch raids are an immediate way to redirect viewers to new content, so choosing a channel with shared interests ensures a seamless transition.
- Engagement and Interactions: Look for streamers who actively chat and respond to viewers. Engaging hosts create a vibrant atmosphere that your audience will love.
- Audience Compatibility: Match the raided channel’s audience size and demographics with yours. Compatibility boosts viewer retention and satisfaction.
- Community Values and Tone: Confirm the raided channel shares your community’s values. Positive, respectful spaces enhance the experience and build viewer trust.
Content Quality Assessment
Choosing the right channel to raid isn’t just about finding someone online at the same time as you; it’s about ensuring quality content that matches your community’s expectations. Raiding allows for immediate viewer interaction and fosters networking opportunities among streamers, so it’s crucial to select a channel that aligns with these values. Dive deep into content engagement by checking if the streamer actively interacts with their chat and fosters a vibrant community. A strong streamer personality adds flair—look for someone who captivates with humor, excitement, or unique insights. Consistent streaming schedules and content variety keep things fresh and engaging. Don’t forget the technical side: excellent video and audio quality, stable streams, and good equipment make a difference. Finally, consider community interaction and entertainment value. Do they host interactive events or collaborate with others? Your choice sets the tone for an innovative, memorable raid!
Preparing Your Viewers for the Raid
Let’s get your viewers pumped for the raid by building anticipation together!
Start by sharing some exciting details about the streamer you’re raiding and why they’re awesome. Raiding is a great opportunity to support other streamers, increasing their visibility and helping to strengthen relationships within the streaming community. Keep them in the loop with reminders and a countdown, so everyone’s ready to make the shift smoothly.
Build Anticipation Together
As you gear up for an exciting Twitch raid, building anticipation with your viewers is key to making the experience unforgettable.
Start by announcing your raid intentions, sparking raid excitement and community engagement. Here’s a quick guide:
- Announce the Raid: Let your viewers know you’re planning a raid. This simple heads-up can build a buzz and engage your community.
- Build Hype: Discuss the raid’s benefits and what viewers can expect from the target streamer. Share past successes to fuel excitement.
- Set a Timeline: Provide a clear timeline for the raid, so everyone knows when to be ready. Encouraging viewers to engage positively in the new channel can greatly enhance the raid experience.
- Encourage Participation: Get everyone involved by asking them to share experiences or guesses about the target streamer.
Your community’s anticipation will make the raid memorable!
Now that you’ve got your community buzzing with excitement, it’s time to share some insider info about the streamer you’re raiding. Explore their streamer backgrounds—what makes them tick? Maybe they’re a pro gamer with killer skills or a creative artist who’s redefining digital art.
Highlight any channel highlights like their epic streams, engaging chat, or upcoming events that viewers won’t want to miss. Twitch provides an API for managing raids effectively, which is essential for a smooth and engaging raid experience.
Explain how this collaboration isn’t just a raid; it’s an opportunity for both channels to shine.
Get your crew ready by letting them know what to expect—will there be a subscriber-only chat or mature content? Encourage them to be active participants, not passive viewers.
Your raid’s about to level up everyone’s Twitch experience, so keep the hype alive!
Executing a Raid Using Chat Commands
Kicking off a raid on Twitch using chat commands is a straightforward and exciting way to engage with your community.
It starts with raid command execution in the chat window, bringing spontaneity and fun. Here’s how you can make it happen:
- Prepare: Let your viewers know about the raid. Build excitement and choose a live channel that resonates with your audience. Ensure that your bot account has the necessary permissions for executing the raid command successfully.
- Execute: Type ‘/raid ChannelName’ in your chat window. This command is your golden ticket to raid-town.
- Countdown: Watch the 10-second countdown. You can hit ‘Raid now’ or let it auto-launch.
- Join the fun: You and your viewers are transported to the target channel, ready to spread good vibes.
Make sure your mods manage the raid for a seamless experience!
Initiating a Raid From the Creator Dashboard
Getting ready to raid from the Creator Dashboard is a breeze and an awesome way to rally your community.
Start by logging into Twitch, click your profile icon, and head to the “Creator Dashboard”. In the “Stream Manager”, look for the “Quick Actions” menu. If “Raid Channel” isn’t there, hit the “+” and add it.
Make sure your stream’s live to see this option. Click “Raid Channel”, pick a target channel from the list or search directly. Twitch raids send viewers from one streamer to another live streamer, enhancing viewer engagement and stream visibility.
Consider raid etiquette and strategies—choose channels that align with your content or engage your viewers. Hit “Start Raid”, and a 10-second countdown begins.
Your viewers will then flow into the target channel, creating a buzz and fostering community spirit.
Customizing Your Incoming Raid Settings
Ready to take control of who can raid your Twitch channel?
You can set specific viewer limits, allowing only channels with your preferred audience size to join the fun. Plus, by managing who gets access, you guarantee your stream stays secure and enjoyable. Streamlabs Desktop offers tools to customize raid alerts, allowing you to personalize images, text, and animations for incoming raids.
Control Raid Access
Although managing your Twitch channel can feel like juggling a thousand tasks at once, customizing your incoming raid settings is an essential step to control who gets access to your stream.
With effective raid access and permissions management, you can welcome the right crowd while keeping unwanted disruptions at bay. Here’s how you can take charge:
- Set specific requirements: Only allow raids from channels that meet your criteria, like a minimum account age or viewer count.
- Limit to trusted circles: Restrict raids to friends, teammates, and channels you follow.
- Deny raids temporarily: Use the Stream Manager to pause all raids when you need a break.
- Select specific groups: Permit raids from particular categories or communities you’re comfortable with.
Stream with confidence, knowing you’ve got control! Organizing alerts and settings to match your preferences can enhance your overall streaming experience.
Set Viewer Limits
Now that you’ve got a handle on controlling who can raid your Twitch stream, let’s explore how to set viewer limits for those incoming raids.
Think of it as crafting a VIP experience for your channel. Set a minimum viewer count—say, 1000—to guarantee high-impact raids, aligning perfectly with viewer engagement strategies. This proactive approach ensures a seamless transition for your viewers, enhancing their experience.
Want to keep things flexible? Leave the maximum count blank, welcoming any raid above your set minimum. This aligns with raid etiquette guidelines, guaranteeing quality interactions.
Head to your Creator Dashboard to tweak these settings.
Adjust the numbers to suit your community vibe, maintaining a balance between exclusivity and inclusivity. By customizing these parameters, you’re not just managing raids; you’re tailoring an engaging, controlled environment that fosters genuine community growth.
Understanding the Difference Between Raiding and Hosting
When you’re diving into the world of Twitch streaming, understanding the difference between raiding and hosting is crucial. Raiding moves your viewers to another stream, boosting their engagement. Hosting, however, plays another streamer’s content on your channel, keeping your viewers at home base.
Here’s how they differ:
- Raiding Etiquette: Guarantee a positive handoff by transferring viewers at the end of your stream, encouraging interaction and support for the new channel.
- Hosting Strategies: Use hosting to showcase others’ content, even when you’re offline, helping to build mutual community growth.
- Interaction: Raiding merges chats, promoting direct interaction; hosting keeps chats separate, focusing on content exposure.
- Initiation: Start a raid with ‘/raid’, while hosting kicks off with ‘/host’.
Ensuring a Smooth Transition to the Raided Channel
Raiding on Twitch is more than just a button click; it’s about creating a seamless experience for your viewers as they hop to a new stream.
First, give your audience a heads-up about the raid and share some exciting tidbits about the target streamer to get them pumped. This kind of streamer etiquette guarantees everyone knows what’s happening and is ready for the shift. It’s important to note that raids are intended to promote streamers and increase their visibility without ulterior motives, fostering a supportive community atmosphere.
Encourage your viewers to engage positively and respect the new streamer’s community. Craft a fun, custom raid message for your viewers to copy and paste into the target channel’s chat, boosting viewer engagement.
Remember to choose a channel that aligns with your community’s interests, guaranteeing an enjoyable experience for everyone involved. Your preparation sets the stage for an epic raid!
Engaging With the New Audience Post-Raid
Ever wondered how to make the most of a Twitch raid once the dust settles? It’s all about the right post raid strategies to boost viewer engagement. First, acknowledge and welcome new viewers by introducing yourself and what your channel offers. Make them feel part of your community immediately. Second, interact through the chat, responding to comments and sparking conversations.
Raids help smaller channels gain exposure and provide an excellent opportunity to expand your audience by engaging with these new viewers effectively. Here’s a quick list to guide your strategies:
- Use polls and Q&A sessions to get viewers involved.
- Display eye-catching visuals and alerts for a professional touch.
- Discuss the raided channel’s content to build a connected atmosphere.
- Invite feedback and suggestions for continuous improvement.
Moderating the Chat During and After the Raid
During a Twitch raid, things can get chaotic, but that’s where effective chat moderation comes into play.
You’ve got the tools to keep things running smoothly and prevent disruptions. Activate emotes-only chat to reduce spam, or switch to subscribers-only to maintain quality interactions.
Want more control? Slow mode is your friend, letting you dictate the pace of chat messages. For added security, implement followers-only chat and set a follower timeframe to deter trolls.
If chaos ensues, don’t hesitate to report disruptive raids or ban problematic users.
Remember, chat moderation isn’t just about rules—it’s about crafting a safe, enjoyable environment for everyone. It’s important to note that reviews for chatbot verification are currently paused, which impacts the tools available to developers and users on Twitch.
Exploring Collaborations With Raided Streamers
Once you’ve got your chat under control and the chaos has subsided, it’s time to think about the exciting potential of collaborating with the streamers you’ve just raided.
Raiding isn’t just about a fun surprise; it’s also a brilliant networking strategy. Here’s how you can kickstart collaborative projects:
- Identify Allies: Target channels with similar size and interests. They’re more likely to engage in mutually beneficial collaborations.
- Engage & Connect: Spend time in their chat, interact, and express gratitude. Building connections can lead to amazing joint projects.
- Initiate Conversations: After the raid, reach out. Discuss potential projects that benefit both parties. Raids can serve as a perfect networking opportunity to connect with other streamers and explore new ventures.
- Stay Engaged: Keep the relationship alive by regularly engaging with their content. Consider future raids or hosting opportunities.
Embrace the potential!